- Joined
- November 11, 2005
- Messages
- 56,705
- Reaction score
- 1,193
- City, State
- Brooklyn, NY
- Year, Model & Trim Level
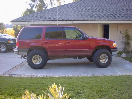
- 88 89 93 95 96 Aerostars
Shock replacement is pretty much a straight forward job unless you have an old vehicle with a lot of rust. Specialty tools are great while installing new parts with no rust. As you will see later on, the most basic tools get the job done while some specialty tools create new issues. We will now begin shock replacement in the front of the vehicle.
These parts are highly recommended when you purchase your replacement shocks:

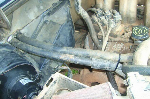
Take a look at what the old parts look like at the top of the photo. This will happen on at least two out of four lower bolts since they get severely rusted. As you could see, the top gets rusted as well:

This is the tool set which is used for installing new shocks:

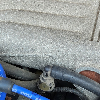
As you will soon see, this tool is not recommended for removing rusted shocks:

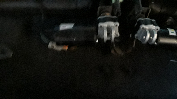
The rusted stud cracked off into the tool creating a new job. The only way to remove the broken stud is to drill a hole through it, then pry it out:

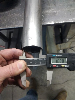
A nut cracker will come in handy if you want to remove the nut without having to turn the threaded rod on the shock:

The nut cracker worked, but the nut still has to be removed:

A special curved jaw narrow pliers will come in handy while holding the stud:

This pliers will work on the upper stud, and the lower retainer on the bottom of the shock.
This is the preferred method to remove the upper stud:

This method is also good:

You don't have to worry about cracking anything off into a tool. The curved pliers will hold the stud in place once the nut is high enough:

A small piece of PVC pipe will give extra leverage, and feel more comfortable to hold instead of holding a box wrench:

The next step is to remove the lower part of the shock in the next installment.
These parts are highly recommended when you purchase your replacement shocks:
Take a look at what the old parts look like at the top of the photo. This will happen on at least two out of four lower bolts since they get severely rusted. As you could see, the top gets rusted as well:
This is the tool set which is used for installing new shocks:
As you will soon see, this tool is not recommended for removing rusted shocks:
The rusted stud cracked off into the tool creating a new job.
The only way to remove the broken stud is to drill a hole through it, then pry it out:A nut cracker will come in handy if you want to remove the nut without having to turn the threaded rod on the shock:
The nut cracker worked, but the nut still has to be removed:
A special curved jaw narrow pliers will come in handy while holding the stud:
This pliers will work on the upper stud, and the lower retainer on the bottom of the shock.
This is the preferred method to remove the upper stud:
This method is also good:
You don't have to worry about cracking anything off into a tool. The curved pliers will hold the stud in place once the nut is high enough:
A small piece of PVC pipe will give extra leverage, and feel more comfortable to hold instead of holding a box wrench:
The next step is to remove the lower part of the shock in the next installment.