410Custom's builds a 2007 Ranger V8 - custom truck build - Project "Ranger Premier" | Page 51 | Ford Explorer Forums - Serious Explorations

  • Register Today It's free!

410Custom's builds a 2007 Ranger V8 - custom truck build - Project "Ranger Premier"

heading to work on “blue” as she has come to be known around here.
Make it sound like the truck has been a part of the family for several generations.


Join the Elite Explorers for $20 each year.
Elite Explorer members see no advertisements, no banner ads, no double underlined links,.
Add an avatar, upload photo attachments, and more!
.


It’s been front and center of the shop for almost as long as I have been in Idaho! We also feel like @EddieMoney is part of our family and we have only really met once


Okay okay I’ll come clean I parted the whole thing out and fled to mexico in my now highly upgraded b2!!!

1B49C6F3-FADD-49FB-AF65-B794F6DB7DE4.jpeg


5546C5BD-86FE-44E1-9175-E7E5258DBE3D.jpeg


Eddie will be driving his ranger way before I’m back in my bronco and my wife is back in her FJ… both have been parked for a year in need of dire attention. Priorities!! Blue comes first


Now we're getting somewhere.


Nice. Are you going to use the tailgate or just bracing for the bed sides?


His factory tailgate and fuel door will be going back on as well as his bed mat.

The interior of the bed will get line x and all undersides of the bed and glass are being coated with spray on bedliner
All metal edges cleaned up /treated before the glass is installed. I also have to put his 07 bed wiring / tail lights into this 02 bed

All the details are coming but for now
Time to get to work
I am not a “good sick” I cannot stand to sit around on the couch for days at a time it drives me insane… but my 51 year old body wouldn’t let me

I am super super excited to actually drive this thing. Nerves are wrecked, but luckily for me I am used to being the test dummy for first drives like this. I’ve been through it so many times. It’s like standing in line at a very scary rollercoaster knowing you are up next


I am not a “good sick” I cannot stand to sit around on the couch for days at a time it drives me insane… but my 51 year old body wouldn’t let me
Totally understand. I can go about a 1/3 of a day before I'm fed up of lying there and just force the sickness of with work outside. Pushing 60 (holy crap) and thankful I don't get sick very often. Worst one was just before Covid hit and I slept and drank grapefruit juice for a day.


Oh and i had to look up the word “tantric”
gross that you used it in a sentence
But fits the situation
Climax is coming (no pun)
Felt compelled to use both “tantric” and “happy ending”, cause, you know . . .

Get back to work!


Felt compelled to use both “tantric” and “happy ending”, cause, you know . . .

Get back to work!
I noticed, and it took all my will power not to make a comment about it.


I am super super excited to actually drive this thing. Nerves are wrecked, but luckily for me I am used to being the test dummy for first drives like this. I’ve been through it so many times. It’s like standing in line at a very scary rollercoaster knowing you are up next
1st drive in my '74 Ranchero after my mechanic friend, Sam, finished the 472 (bored 460), back before people were doing much with 460s, went like this - started it up and let it run in the shop for 20 minutes while we checked for leaks and he fine tuned it. Sam got behind the wheel for the test drive so he could get a feel for how it was running and what adjustments might be needed. We went down the street to the shop of a rival Ford guy who knew Sam was building this engine. Sam turned the corner and did a big burnout. I was sure my brand new engine was going to blow before I got a chance to drive it! We headed out of town, looping around to the main highway. On the way back, he stopped on the highway in front of a mini golf course and did a bigger burnout than the first one! On that first test drive, he probably revved that brand new engine higher than I did in the nearly 25 years I drove it after that. Of course, we both knew who was going to fix it if it broke.


Some updates before she can leave this shop and head to the town shop for final testing, setup and polish we needed to finish a few major things

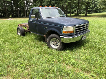
First she was pushed outside and washed again

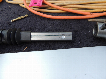
The rear bumper and hitch install not easy
The Kartek shackle flip brackets live directly where the hitch used to mount. They are also right where the factory bumper brackets reside.
Much thought and then some cardboard templating and I have them fitting

The hitch will actually be welded to both Kartek brackets so basically the rear spring hangers are also the hitch. The hitch acting link a rear crossmember keeping things tight and straight.

The bumper brackets had to be “windowed” to clear everything, now factory bumper can bolt in and out. These pics from mock up all parts cleaned, prepped welded painted and then re installed

CDD8E61A-2205-4530-A5F9-9874884FF5C7.jpeg


D911E5C4-E970-4207-A0C4-B4E7F09C5A7C.jpeg


7606197B-3C6E-4B1D-9990-D5B3D1E940FB.jpeg


4F4CB497-CB8B-4BB4-97E6-DA5047F7BDF9.jpeg


AA1CBF9C-662B-413A-AF15-A5E53511E6FE.jpeg


446CB222-635E-4991-8A52-CEFA15D018FA.jpeg


B718E06C-A93B-46B9-A42A-D1DAD4BF2D13.jpeg


7B2362CF-721A-4358-B451-54BFFBEC8D81.jpeg


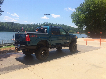
At this point the rear king shocks were final
Installed as well as the driveshafts

Brakes are plumbed, air line for the arb locker went in, the e brake cables are being fabricated and more

You can see the exhaust tail pipe also being mocked up. A $30 aftermarket ranger tailpipe was used as a guide

Fog lights final mounted tight, drivers broken mirror glass replaced, winch final wired, lots and lots of little things happening


First up the tow hitch
Lots of metal had to go away as the Kartek spring hanger is where the hitch used to mount
Template was used to make the marks after careful
Measuring then things cut out with grinder and surfaces prepped for welding

7E892596-5AD7-424A-9F19-121E0658D8FF.jpeg


82E6AC99-517E-4386-A79B-9EF753EA5AFC.jpeg


30A4564B-92A1-4907-B103-8FAB9A035EDC.jpeg


F0866D40-AC20-4B01-B91A-EC4975467F3F.jpeg


This is how the hitch will clear the bracket before it is then welded to the bracket

I have a spare set of Kartek hangers as my next project will also be setup with this rear Chevy 63” spring and inverted shackle

E32C5C01-9BFF-40AE-89C7-9ED0256AAAE2.jpeg


6754C5A3-BE1F-44DD-BE17-66BE4B2BCE22.jpeg


Test fit off the truck


Now the bumper she needed a large window cut on both sides
Small plate will be added back for strength

0E757D67-3B1D-47C2-BA55-BDAA75B75613.jpeg


CC2AC606-3460-4B12-BFD5-91D202D875AA.jpeg


927C72B2-A1E0-43E4-9A12-E3000AE2ACC2.jpeg


That’s how she fits
Now to transfer to the other side

4E0ECEAC-F660-4254-8CB2-89C044E7AC78.jpeg


D4145CF3-C2ED-4291-81EA-AACF58656FA1.jpeg


F74CC2B1-8DA1-46A6-8C5F-8250E5CD161C.jpeg


A19DF37E-CB33-4EFF-B05E-9A2D000E7502.jpeg


Bumper hitch finally dry fitted
Fun to do by yourself! My arms got quite a workout here
My brain and the grinder also had quite a workout for this one, there is a lot going on at the end of the frame horns now! Really happy with how this turned out


So I turned my attention to building twin custom tailpipes. The exhaust has been 2.50 up to this point and is 3” where it exits the spintec mufflers. I will be necking down to 2.25” for the tailpipes
The aftermarket $30 tailpipe I ordered is kinda “chincey”’origialnally thought I could save some work by using bits from a couple of these but I don’t like the kinks and the pipe is like 1-3/4 in places. So I simply used it for Mock up. Don’t worry plenty of rangers come through this shop that will need a new tailpipe. The parts will get used

1A0CF544-0244-4DCE-AF4C-608EF2ECC803.jpeg


BB017F87-FA99-4EE6-BDB3-043E789FAB18.jpeg


C4AEC14C-04C4-4430-A659-607E8A6DA8EE.jpeg


FD3B50EF-3ADD-4D20-B630-06B9FB90BD2A.jpeg


6DEF3720-2F6F-40EE-9218-54EB04EBC938.jpeg


And the start of the tail pipes

I love my mini Milwaukee band saw!

6A7BA1C1-5E7E-410B-85F5-CD0B91BB1C59.jpeg


8B36970E-8479-4EBF-BC7C-70CA15FA750F.jpeg


7BA690EF-F3B2-42AE-A452-351CF10C5063.jpeg


5243320B-881D-4A68-AE9A-DE3CCA40CC68.jpeg


AA15E58D-4BFD-40A8-AC3A-B601ADC51150.jpeg


Lots of plumbing wiring and little brackets to fabricate, final touches
Stay tuned
She’s running driving stopping shifting test phase


Shotgun exit!
Tail pipes un bolt from mufflers
They also un bolt from each other
Easier for final weld

E745F19D-47E3-417C-A471-8882554BEEE5.jpeg


0B14C687-C15E-441D-AF30-0DA9BCD848D6.jpeg


3D4424CD-F23F-48CD-AF68-A9BD11399B7E.jpeg


815ABC5F-CFEA-4D59-86CE-E664EA09353A.jpeg


5C95159C-A319-41E0-BFA7-0CD41912A281.jpeg


25F0B143-B43A-43B7-A320-4E078C4AA2E6.jpeg


DA0C0292-5D48-456F-9F98-3BDC39799C70.jpeg


C2091DE8-BD6E-46F2-B120-E0B43FB0F2F1.jpeg


0590C368-FD0E-4FCA-84E9-40AAC5E42D4C.jpeg


Hitch is welded to the rear shackle hangers
All exposed surfaces welded brackets prepped and painted

The hitch now has 14 bolts that holds it on :)

BBEBB75B-3F2E-4A68-8AA9-A391D99B7A21.jpeg


67A4A650-CBBA-4790-9826-2554EC47D9E1.jpeg


B69D8AA3-B746-4347-921E-B14D0C2F0932.jpeg


95E5BC02-83E9-44B5-B129-42DD39775E79.jpeg


CEF5935A-02DA-4E47-8996-C0CFDE88D196.jpeg


6965D430-474A-4A79-BCE0-660B6DA600D9.jpeg


B1A92547-3D24-4248-9049-ED92F0DDA624.jpeg


2BE05955-3B6E-4314-BA65-95C03BF59A37.jpeg


Join the Elite Explorers for $20 each year.
Elite Explorer members see no advertisements, no banner ads, no double underlined links,.
Add an avatar, upload photo attachments, and more!
.


Tailpipes removed and final welded

AB83F8A1-90B6-4D39-9FD9-1B49F6CF0C8D.jpeg


78C5B449-CD50-4C1C-B25A-7880D6531BF9.jpeg


E7D6A956-C405-4976-9ABB-CD97E1B97E05.jpeg


FBB932C2-CB01-44BB-8003-EE579D687643.jpeg


0381F29C-B09D-484F-AC99-36941FC8FF60.jpeg


D28DFB8D-2733-431D-BF02-BA9CB6E88C54.jpeg


41F535D9-8097-482C-9111-03EFAD6AE8F6.jpeg


2C9447F3-67EF-479D-9016-30EC838D8B3B.jpeg


011B7075-2F0C-4453-91DB-AE0C2A62C27A.jpeg


Back
Top